By Ed Friedrich
Many of our Multi-Probe Micromanipulator users look to us for guidance on how to optimize their Multi-Probe Micromanipulator (MPM) configuration for their lab and research goals. Our answer is usually “it depends” – what does the behavioral apparatus look like, how large is it, how many probes are you using, which neural probe are you using, which microscope do you plan to use, etc.?
It’s all about your available space and how we can best configure a system that takes up as little room as possible while enabling you to hit your target probe trajectories.
We have been working closely with Andy Peters, Peters Lab, University of Oxford, as we interfaced our Pathfinder Software to Neuropixels Trajectory Explorer. His application approach is unique and works great in his lab.

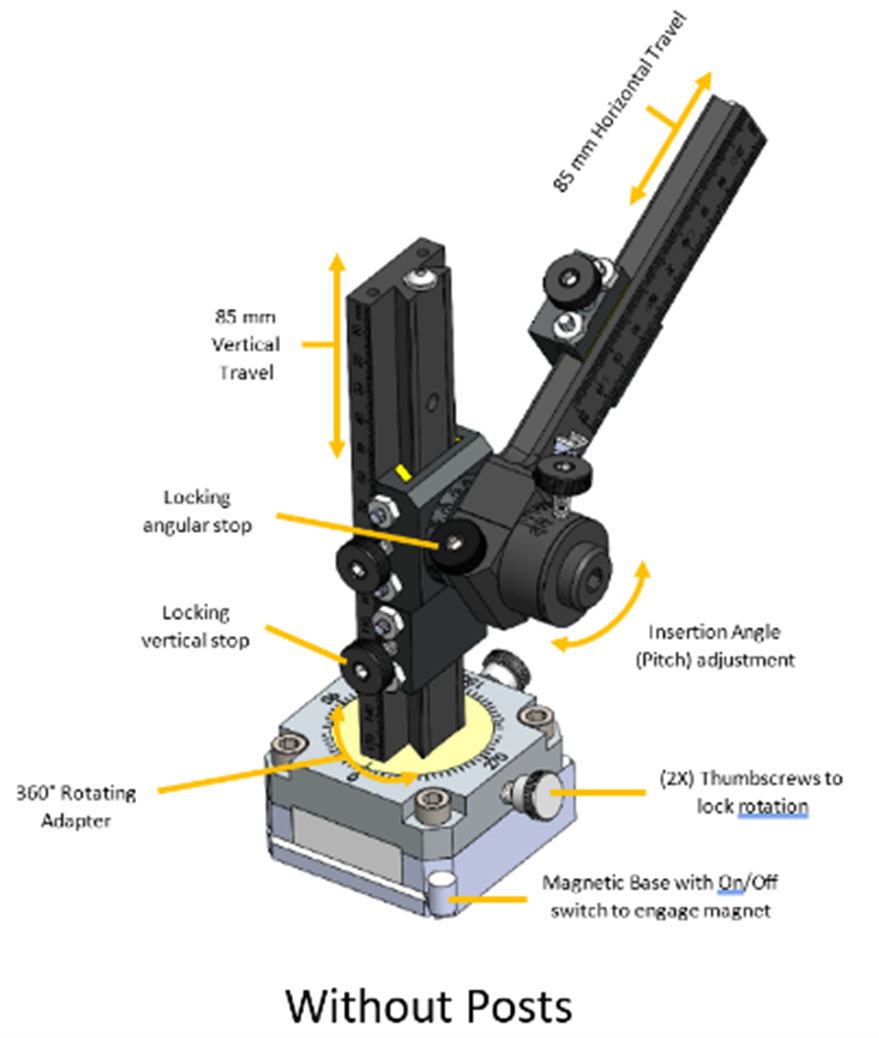
The standard MPM 4-Degree of Freedom (4-DOF), with a magnetic base, was selected because it can offer more flexibility than our standard upright or inverted 4-DOF arms because you can place it anywhere on your breadboard, without requiring the usual dovetail mounting ring. This flexibility adds extra value when your other equipment may be in the way of a regular upright or inverted 4-DOF arm and the probe insertion path.
In some cases, it is necessary to raise the MPM arm when used with the magnetic base, offering even more flexibility. In this image, Peters showcases a widefield imaging setup, with a probe extender, magnetic MPM 4-DOF arm, and extenders from Thorlabs to allow the 4-DOF arm to be elevated above the widefield image screens, and the probe to still hit its target with the extension plate. We quickly realized that Andy’s great idea could be useful for other labs.
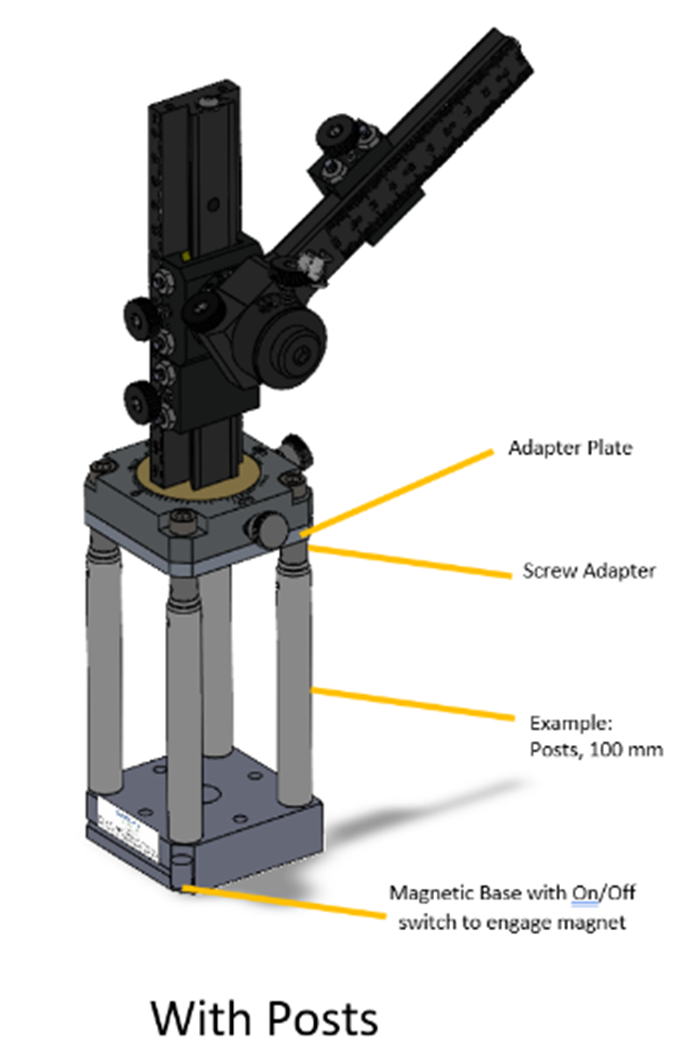
Posts Available from Thorlabs
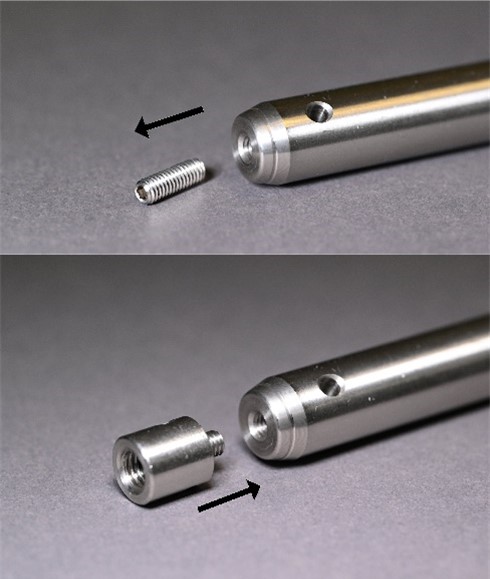
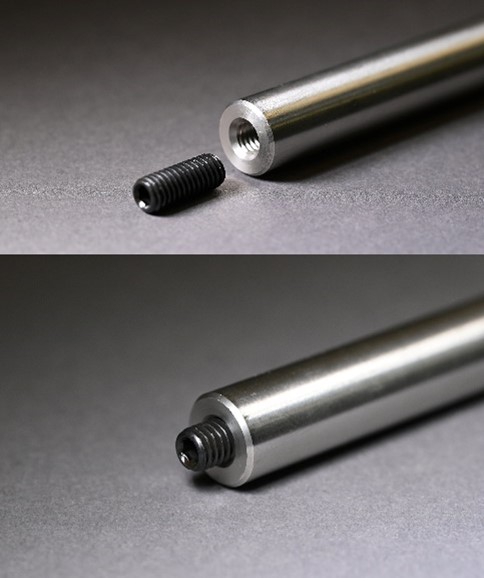
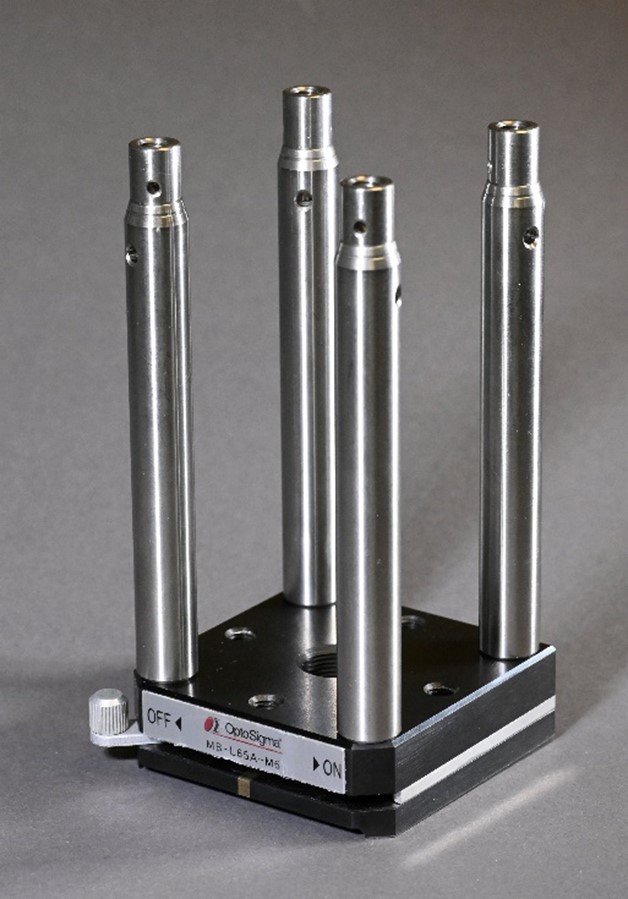
New Scale now offers the necessary adapter plate and screws to allow users to purchase off-the-shelf optical posts, at their desired length (Thorlabs Part Number: TRXX/M), and thread adapters, directly from Thorlabs Inc., to replicate this setup.
The following posts are available from Thorlabs Inc., as of the writing of this blog:
| TR20/M | Ø12.7 mm Optical Post, SS, M4 Setscrew, M6 Tap, L = 20 mm |
| TR30/M | Ø12.7 mm Optical Post, SS, M4 Setscrew, M6 Tap, L = 30 mm |
| TR40/M | Ø12.7 mm Optical Post, SS, M4 Setscrew, M6 Tap, L = 40 mm |
| TR50/M | Ø12.7 mm Optical Post, SS, M4 Setscrew, M6 Tap, L = 50 mm |
| TR75/M | Ø12.7 mm Optical Post, SS, M4 Setscrew, M6 Tap, L = 75 mm |
| TR100/M | Ø12.7 mm Optical Post, SS, M4 Setscrew, M6 Tap, L = 100 mm |
| TR150/M | Ø12.7 mm Optical Post, SS, M4 Setscrew, M6 Tap, L = 150 mm |
| TR200/M | Ø12.7 mm Optical Post, SS, M4 Setscrew, M6 Tap, L = 200 mm |
| TR250/M | Ø12.7 mm Optical Post, SS, M4 Setscrew, M6 Tap, L = 250 mm |
| TR300/M | Ø12.7 mm Optical Post, SS, M4 Setscrew, M6 Tap, L = 300 mm |
You will need four posts. The top of each post is threaded with an M4 female thread. You will need a thread adapter to convert this to an M6-1 thread, Thorlabs Inc. part number AS6M4M. Order four thread adapters, one per post.
Take the Next Step
For more information and a complete list of instructions, please contact us or visit our user portal to download our MPM Hardware Guide.
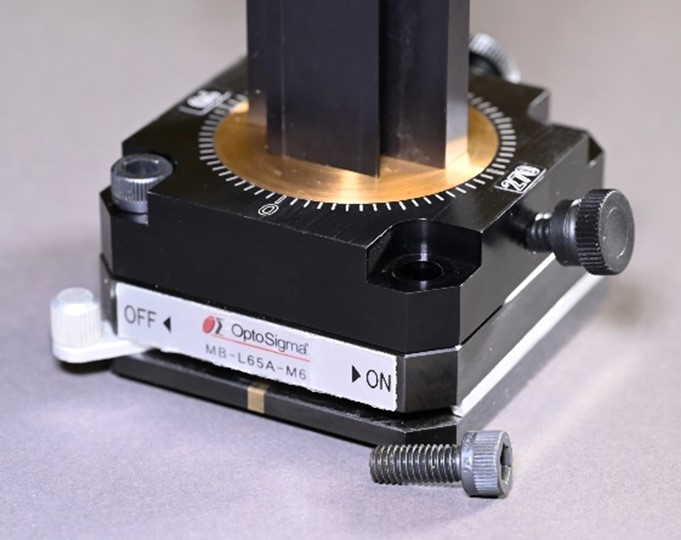
DOF-Magnetic-Base
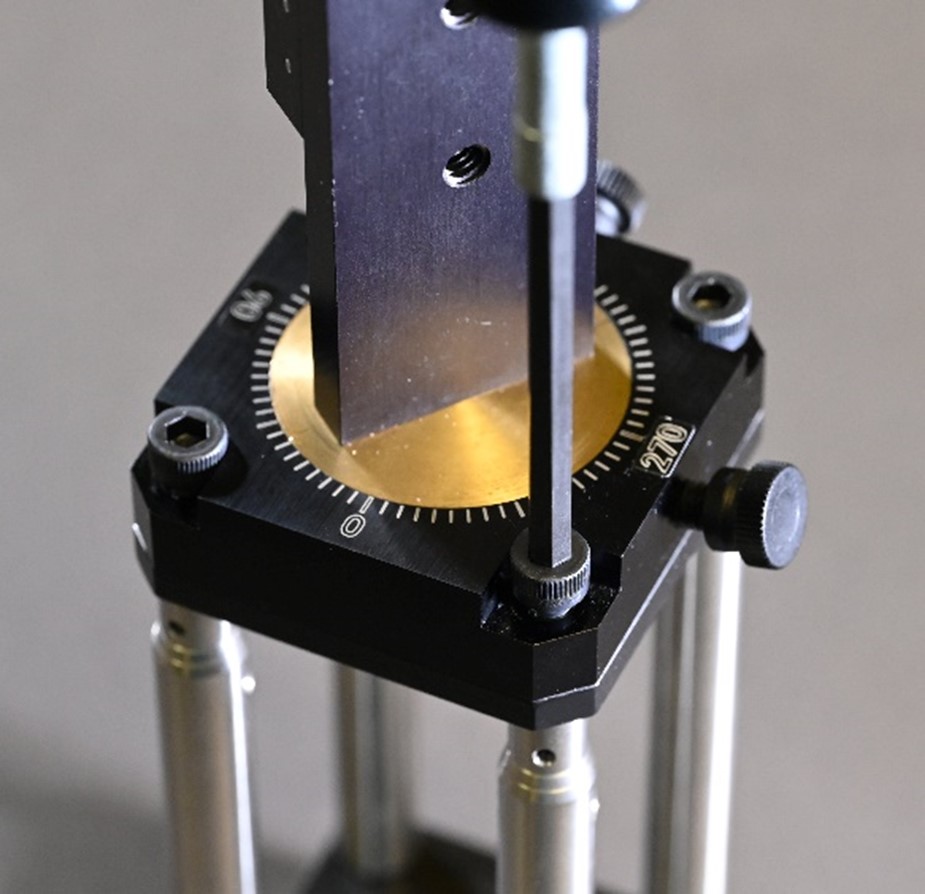
Base-With-Extenders
Thorlabs-Optical-Posts-Thread
Thorlabs-Optical-Posts
Optical-Post-Extenders
MPM-Without-Posts